Sunday, October 30, 2011

Busy Weekend and A Pillow

I had a pretty great weekend. I got to spend time with lots of family. On Saturday my mother in law also took Emily for a bit and I was able to take a two hour nap, do dishes, and take a shower in peace. It was so nice to be able to do those things without worrying about Emily getting bored with her activity and needing a change every ten minutes.
.
I also completed another pillow this weekend. My 'Number 3' pillow is available in my Etsy shop: icraftwithlove.etsy.com
.
.

Friday, October 28, 2011

The Etsy Shop is Finally Open!

.
I'm super, super, duper excited to announce my Etsy shop. After working to get my stuff together, take pictures, and post it all I finally have it up and running. Stop in and check out all of the things I have up. I will definitely be adding stuff gradually.
.
All of the things I make are filled with love. There is love in my home and love in my hands when I'm crafting. I have always had a passion for art and very much enjoy to make things. This is why I decided to name my shop I Craft With Love. So you can find the new shop at icraftwithlove.etsy.com.
.

Linking Up

Here are some websites that I'm linking up to:
Vanessascraftynest.blogspot.com
familyeverafterblog.com
thirtyhandmadedays.com
whipperberry.com
kojodesigns.blogspot.com
shabbynest.blogspot.com
lovelycraftyhome.com
iamalongfortheride.blogspot.com

New Art Blocks!


So excited about my new art blocks. Handmade by me, wood blocks with cool pictures or sayings. These will be featured in my very soon to be Etsy shop. I should have the shop up and running sometime today.
.
.
.
.
.

Wednesday, October 26, 2011

Link Parties

linking up!
Somewhat Simple

Canvas Totes

Another thing that will be sold in my soon to be Etsy shop are canvas totes! I love these French inspired totes. I'm thinking of also doing number totes and scrabble letter totes.
.
.
.
.
These three will be in my shop as soon as a get a few other things completed.

Tuesday, October 25, 2011

Pillows and An Etsy Shop

.
The last couple of days I've been working on a lot of projects. Some of these projects are pillows. I love throw pillows and decided to make some canvas pillows.
.
.
I have some other projects that I have finished in the last couple days and have decided I am going to make an Etsy shop. I have been thinking about it for a while and I've finally decided what I'm going to be selling.
.
.
These pillows along with canvas totes, art blocks, and other things that I make will be featured in my new shop. I should be starting it within a week so keep your eyes open!
.

Monday, October 24, 2011

Upcycled Spaghetti Sauce Jars


.
These jars once held spaghetti sauce...now they have a new life and could be used to hold and give little gifts or used on display at home, or used to hold crafting supplies. I used Mod Podge to affix ripped up book pages onto the jars. I also spray painted the lids. Very easy way to upcycle your glass jars.
.
.
.
A heart.
.
.
.
I think this one would be cute to give baby shoes, baby socks, a few onesies, burp cloths, bibs, or washcloths as a gift.
.
.

I'm linking up.

Here are some parties I'm linking up to today:
So many cute projects on all three of these pages, go on over and check them out!

Sunday, October 23, 2011

Total DIY hair feathers!!

.
So, I'm sure you are aware that hair feathers is one of the latest trends. I wanted to try them out but wanted to DIM (do it myself) :).
.
.
I'm sure if you're on pinterest you've seen this DIY hair feather picture floating around. The original site of this picture is http://elisajoy.com/mclaughlindesigns/2011/06/diy-feather-extensions/. This is the tutorial that I followed.
.
They bought their extensions from an online shop...I took it a step further and made my own feather extensions...total cost...$4.50 and I have plenty of supplies left to make more. I bought a package of feathers and a package of crimp beads (found by jewelry making items). I used the skinniest piece of ribbon that I had at home and a couple beads I already had. I would string my crimp bead onto the ribbon, place it where I wanted the feather then insert the feather and crimp. I'd add one or two beads above the crimp bead. I did this in multiple spots. Once I had my extension the way I wanted it I figured out where I wanted it in my hair and followed the tutorial on the original site and crimped it into place.
.
.
.
I love my total DIY feather extensions and so far they've lasted a couple days through sleeping, washing, and styling. I'm not sure if they'll last as long as store bought or salon placed extensions. I do plan on buying clip in extensions you can find in stores for very reasonable prices and cutting off the clip and actually crimping them in my hair.
.
.
.
With a cute, pink braid. The pink is semi-permanent 4-6 washes. :)

Saturday, October 22, 2011

The Flower Girl

Let me start off by saying that it is a BEAUTY-FULL fall day! I love it when the sun shines!
Today we get to celebrate a bunch of birthdays on Jeff's side. Food, family, and fun.
.
Today's post is about a new chair named 'The Flower Girl.' She started as a $3.99 Goodwill chair which happened to be the color of the week, so I snagged her and her brother (no flower) up at about $2 each. What a deal! I payed $10 at Walmart for a canvas drop cloth which is 6'x9' so I'll have a lot of material left over. So by the time I finish the matching chair I'll have spent $7 a chair with a bunch of material to do other projects, I think that's a deal!
.
Here's how The Flower Girl looked before:
.
.
Purdy huh? She just needed a face lift and I was the perfect person for the job :).
Here's how she looks now:
.
.
.
.
.
A much needed improvement on a wonderful little chair.

Friday, October 21, 2011

Frenchy

Frenchy is a little footstool that got a big makeover. She was picked up out of a garbage (I never get why people throw good furniture away). My mom actually beat someone to her! She's a prize to some people (this is a 'one person's trash is another person's treasure' story). She was sad looking in her leopard print.
.
.
I took out all the existing staples, took off the leopard and began working on my burlap design. I originally had my French bistro artwork on dark burlap which I liked better. It was all stapled on, getting the finishing touches when I laid Frenchy upside down in black paint. I couldn't recover from that so had to start over once again. I didn't have anymore dark burlap left so I did her over in the light fabric that I already had.
.
.
.
In the end She turned out looking better than before with some black paint on her legs. I don't absolutely love this piece and it was more work than expected because I did it all twice (even the leg painting because I didn't like the first color I chose with the lighter fabric). Live and Learn not to set your projects on your newspaper with paint all over it.
.
.

Thursday, October 20, 2011

The Baby Blue

I love this coffee table (and it's my favorite color). I would keep it for myself but it doesn't 'go' in my living room.

.

Here's how it started (not too bad at all, awesome shape, just kind of boring).

.

.

This is how it ended up!

.

.

I love the 'pop' that it has. I actually just painted this with acrylic paint that I mixed. The coverage wasn't great and I purposely didn't cover the entire piece, 'missing' spots here and there to give it an aged, distressed look. I didn't even habe to sand any edges. This piece is for sale, if you're interested please contact me.

.

.

.

Wednesday, October 19, 2011

Desk Redo


As I type Emily is sleeping....in my arms. This is something she rarely does so I'm enjoying it, even if my arm is falling asleep and I have to type one handed.
My parents' pastor and wonderful (beautiful) wife moved and were getting rid of this beauty.
.
I love the clean, straight lines but it obviously needed an update.
.
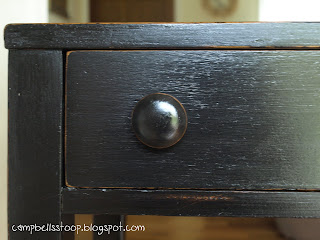
I used black acrylic paint, scuffed the edges with sandpaper, then used some stain on the revealed wood. I finished with Miniwax Polycrylic.
.
I sent a picture to the original owner and she's deciding whether it will work in her new house.

Thursday, October 13, 2011

Today's Project


Today we had two great nap times, meaning I was able to get a lot of stuff done around the house. This next project was a little chest of drawers that I had back when I lived at my parents. When my parents moved, I got this back. It had a poorly painted beach chair on the side from back when I painted half of a palm tree on my bedroom wall (which never got finished). It was a solid piece but in serious need of a redo.
I wanted to mod podge book pages on the sides and ended up not liking it and painted over thinking it'd give it a cool look. I don't like that part. I should have just painted the sides like I did the top and the front. Live and learn.
After I painted the piece black, I went over the edges and scuffed them up with 150 grit sandpaper. I took brown acrylic paint and with my finger applied it to the edges to try that famous pottery barn look. I like how the paint job turned out and I'll try it again on another piece (without the book pages).
.
.